Happy World Bread Day:)
Today I thought I would post something sort of different from what I usually post:) As you all know I dabble a little in historical food… so I thought it would be fun to post my way of making Civil War Army Bread, aka Hardtack.
What is hardtack you ask? Well, it is a dried out flour flatbread that the Civil War soldiers carried with them during the war in their haversack (which was a canvas bag painted with a linseed oil based waterproof coating.) Hardtack was as it’s name implies, is VERY HARD.. in fact, it is also known as “tooth dullers” and “sheet iron”. This Army bread didn’t take up much room in the soldier’s bag, was light for the amount of calories it offered and kept almost indefinitely! Today there are still pieces of hardtack in museums and historical societies.

Piece of Hardtack at the Minnesota Historical Society. http://content.mnhs.org/education/items/show/264
The only thing that really ruined hardtack’s shelf life was moisture, then the hardtack would get moldy. As for pest, most pest had no interest in this hard flatbread.. except for the weevils, which added well, protein to the soldier’s diet. (Really, I am not kidding about this.) Hardtack was a multi- functional sort of item. The soldiers would smash it with their musket handles and add water to make pancake like meals. Sometimes they would dunk it in their coffee or water, this softened it a bit, then they would add a bit of salt pork and make a tasty sandwich. Often times, when the soldiers had bacon they would use the bacon grease to soften the hardtack and then cook it in the bacon grease, this was called Skillygalee. When dessert time came no need to crave mother’s house for a dessert, this all in one food item was also dessert, once softened, the soldiers would sprinkle sugar, honey or sorghum on it to make it sweet. Sometimes if there were fresh fruits on the trees they would add them thus making a have a fantastic dessert; otherwise, they would just enjoy their sweetened Army Bread. So now you know a little about Civil War Army Bread, aka Hardtack:) A special thank you to my Boyfriend, the Civil War Guy, who helped me with a few of the details I was not sure about:) If you want to know more about the Civil War check out his blog at http://thecivilwarguy.com/2012/05/ .
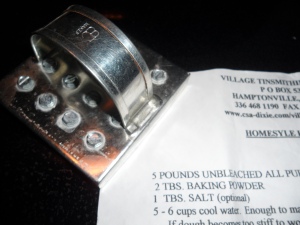
Now on to the recipe for Civil War Army Bread… this recipe was adapted from the Village Tinsmith’s Recipe. The ingredients are basically the same but the procedures are different:) Now if you ( OR you could give it to someone you love, or like.. this makes a great inexpensive Christmas or Chanukah gift) really gets into the Civil War , or if you are a survivalist.. you can always order a Hardtack cutter from the Village Tinsmith @ http://www.csa-dixie.com/villagetinsmith/c.html . The Hardtack cutter is only $14.00 and it comes with an adapted recipe from an 1860’s cookbook.
Civil War Army Bread aka Hardtack
adapted from the Village Tinsmith
( This makes about 50 pieces of Civil War Army Bread that are about 1/2 inch thick- a little note.. this recipe and the procedure are not difficult, but it does require a lot of oven time, great project on a cold day)
- 5 pounds white unbleached flour
- 2 Tablespoons Baking Soda
- 1 Tablespoon Kosher Salt
- 5 cups of warm water
- Preheat your oven to 300 degrees.
- Line your baking sheets with parchment paper
- Clean your counter to make room for rolling your dough
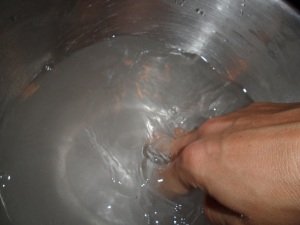
- Place warm water ( I use warm tap water- don’t make it hot, just warm enough to quickly dissolve the salt) in a bowl, then dissolve kosher salt in water.
- Meanwhile, place all your flour on your clean work surface. In one tall pile, think pile of sand. Then make a hole in the middle, think volcano hole:)
- Place the baking soda in the hole.
- Once salt has dissolved in the warm water, grab a regular dinner fork and get ready to work your arm and stomach muscles:)
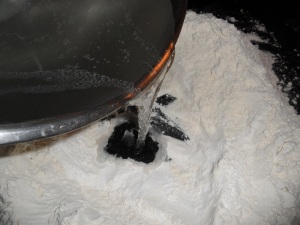
- Now this is the fun part… add about a two cups of the warm water in the hole. Watch…. and it fizzes up..LOL This is really neat!!!:)
- Now take the fork and start slowly pulling in the sides of the hole of flour.
- When this mixture becomes too thick add a little more water about a 1/2 cup at a time. Pull the flour sides in again and mix with the liquid center. Keep doing this until you have used up all the flour.
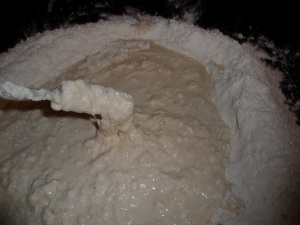
Incorporating more flour into the center, it will be the consistency of paste then get really dry…this is good, just keep adding the water a little a time
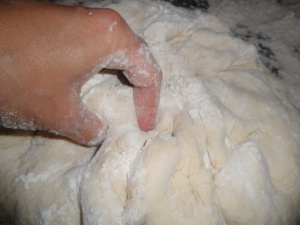
- Then start kneading the dough with your hands. Try to incorporate as much flour as you can …. THIS IS SUPPOSED TO BE A DRY DOUGH:) A VERY DRY DOUGH:) What I do to incorporate the last of the flour is to stick my fingers in the dough and make an indentation then put flour in the holes from my fingers , then continue to knead so that the dough is able to fully incorporate the flour.
- Keep kneading the flour into the dough until you have an extremely dry dough.
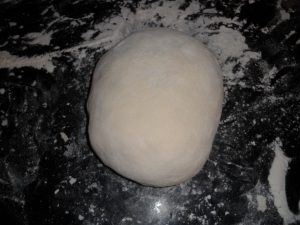
- Once most of the flour is incorporated ( I had about 1 1/2 cups of flour left over, so don’t worry if you have a little left over flour- set the flour aside) press your finger in the dough. If the indentation does not stay ( another words the dough reshapes back to before you indented it) your dough is ready…
- Your dough is ready to take a nap. Dust a bowl with flour and place the dough in the bowl, then cover the bowl with a piece of cling film. Set the bowl aside for about 20 minutes. This allows the dough to relax ;thus, your shape will hold when you cut it with the Hardtack cutter.
- Preheat your oven to 300 degrees.
- Meanwhile, clean your workspace so that you will have a place to roll your dough. On a side note, this stuff is really hard to get up once it dries- it is sort of like glue so clean it up while it is still fresh:)
- After about 20 minutes, gently turn the dough out onto the workspace.
- Cut the dough into quarters. Place three of the quarters back into the bowl and cover them with the cling film.
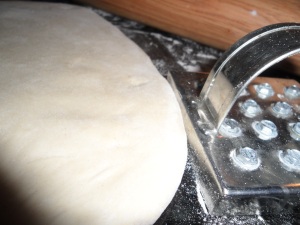
- Then dust your work surface with your leftover flour, from when you made the dough, and roll the quarter out that you have on the workspace. I find that trying to roll it into a rectangle like shape works really well with the Hardtack cutter:) Note: If the dough sticks to the work surface, it means you did not add enough flour 🙂
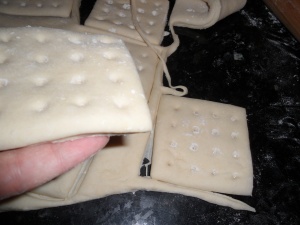
- Once dough is all the same 1/2 inch thick ( 1/2 inch to 1/4 inch thick is the recommended thickness), dip cutter in flour then place cutter into the dough. Start at the edge of the dough and work inward. If you do not have a Hardtack cutter, you can make round shapes, or make squares. The size of the cutter is 3 inches by 3 inches with 16 holes, which can be made with a clean screw:)
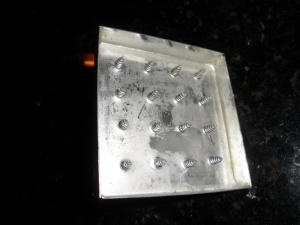
Underside of the Hardtack cutter… yes, it looks like something from the medieval torture chambers… hummm maybe I should have saved this post for Halloween:) A little side note… yes, those screws are sharp.. very sharp:)
- After you have cut out all the hardtack you can out of the piece of dough, lift up the extra dough, then all you will have left is the pieces of unbaked Army bread. All the scaps set aside in the the bowl with the other quarters of dough. Then once all the quarters are rolled out, put all the extra scraps on the workspace and roll them out. Don’t rework the scraps right away, the dough will not hold its shape- let it rest for a bit first, then roll it out:)
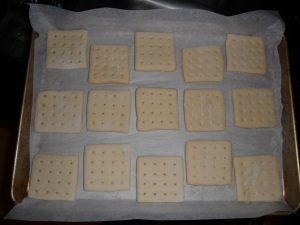
- Place unbaked Army Bread on the parchment lined baking sheet. You can place these pretty close together, they don’t change much in size.
- Place in 300 oven for about 1 hour, then turn over pieces. Continue to bake for another 30 minutes.
- Then check the pieces. They should be really hard… like you are scared to drop them because they may break your foot! This process takes a while. I live on the beach so mine took quite some time to dry out about 2 1/2 hours… the time will vary on the thickness and the moisture content in your dough, and the moisture in the air.
- Once hard as a rock…:) Turn out onto a cooling rack and cool completely, before putting away.
There you have it… a bit of history Perky’s way:) Just be careful when you eat this…. this is VERY HARD..IT CAN DAMAGE YOUR TEETH:)

